
USD/JPY Short: waiting for the Carry Unwind
A conditional USD/JPY short needs a confirmed break below 157.50, lower U.S. yields, and follow-through toward 154-155 to become worth pressing.
The clean idea is to short USD/JPY only after confirmation below 157.50, use 156.31-156.40 to de-risk, and keep the real target zone at 154-155. The stop is 159.50 unless the entry comes from a failed retest that allows tighter risk.
The setup is conditional. Spot is still above the trigger, the dollar still earns positive carry, and a shallow dip to the first target is not enough to justify forcing the trade. The edge comes from a proper carry unwind: failed upside near 160, support breaking, U.S. yields rolling over, and crowded yen shorts getting trapped.
Current read
As of the May 26 close in the spot proxy, USD/JPY was 159.31. The sell stop remains untriggered, with price closer to the 159.50 stop zone than to the 157.50 entry.
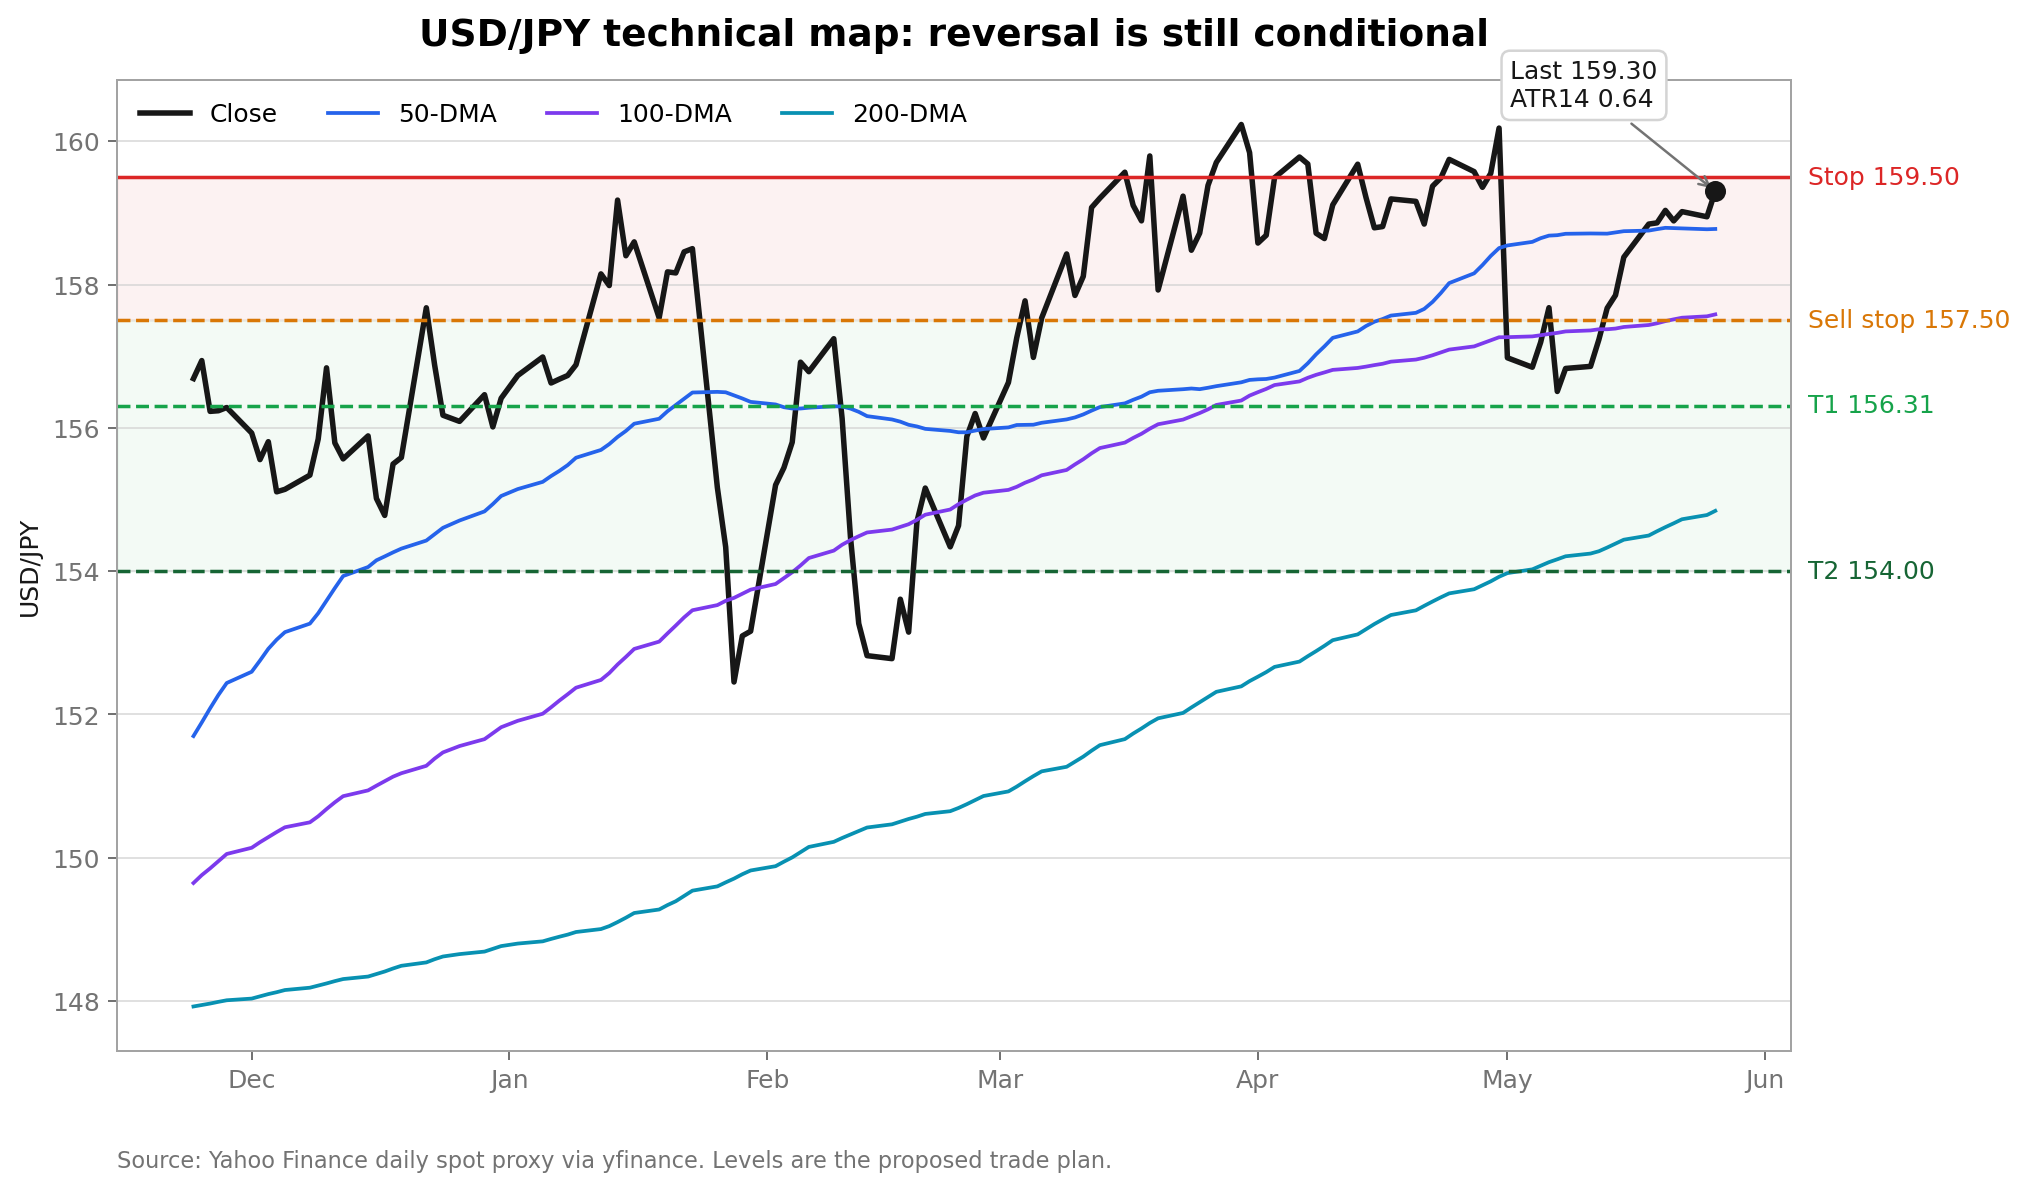
The sell stop is doing useful work: the chart still shows a conditional reversal, not a confirmed breakdown.
The key technical map:
| Signal | Read |
|---|---|
| Last close | 159.31 |
| Proposed entry | 157.50, still untriggered |
| 100-DMA | 157.58, almost exactly the trigger zone |
| 200-DMA | 154.84, near the main target zone |
| 14-day ATR | 0.64, so the stop is about 3 ATR above entry |
| YTD range | 152.28 to 160.70 |
157.50 is a useful tripwire because it lines up with the 100-DMA and the 38.2% retracement area from the 2026 low-high range. A wick below it is not enough. The cleaner trigger is a 4H or daily close below 157.50, followed by either a failed retest from underneath or continuation with U.S. yields confirming lower.
Payoff
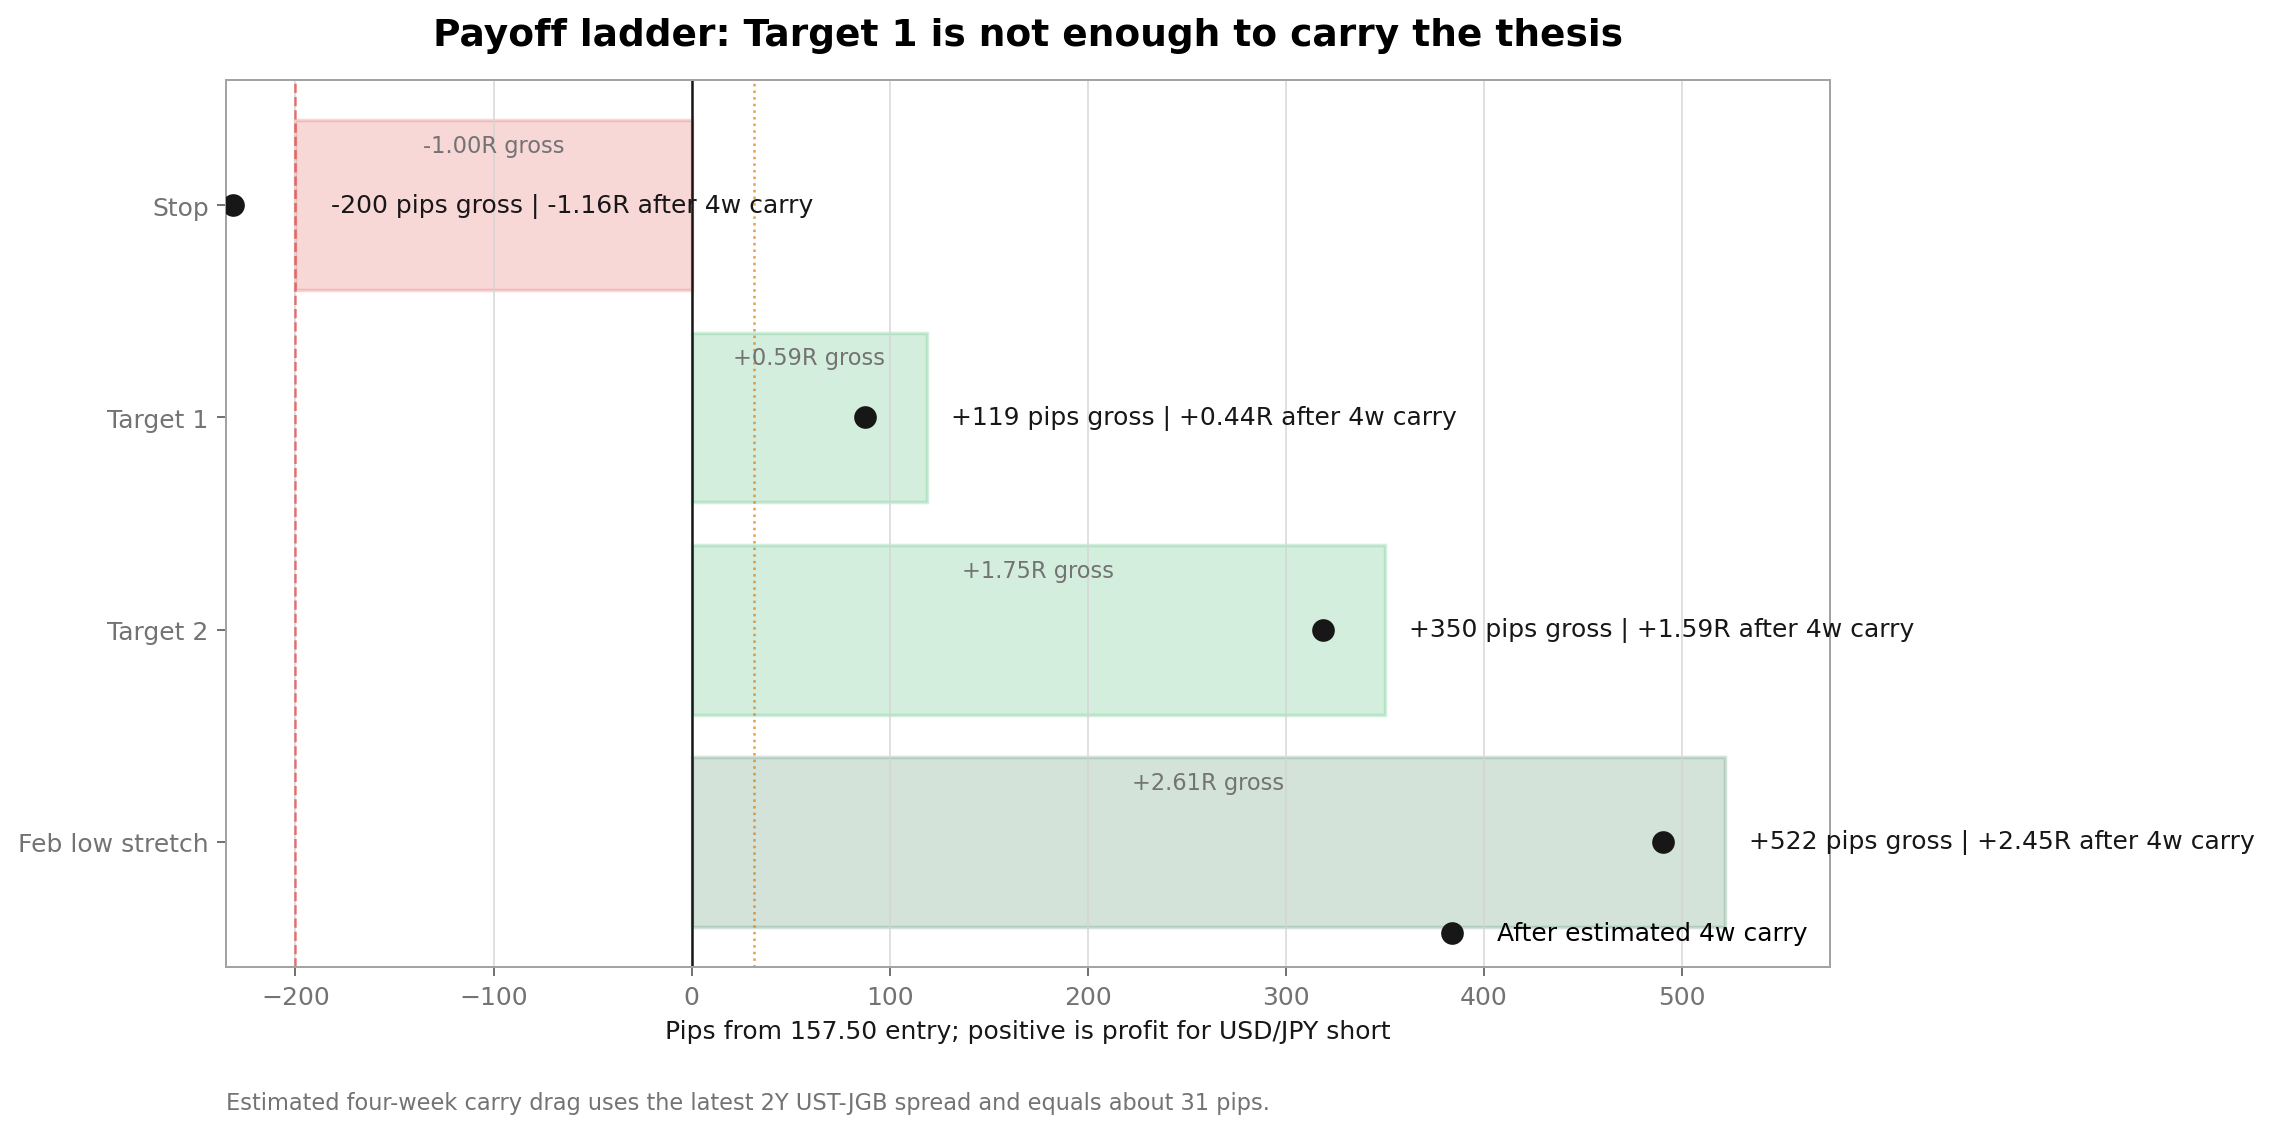
Target 1 is useful for de-risking, but it is too small to justify the trade by itself.
The math from 157.50:
| Level | Gross pips | Gross R | Approx. R after 4 weeks carry |
|---|---|---|---|
Stop 159.50 | -200 | -1.00R | -1.16R |
Target 1 156.31 | +119 | +0.59R | +0.44R |
Target 2 154.00 | +350 | +1.75R | +1.59R |
Feb low zone 152.28 | +522 | +2.61R | +2.45R |
The first target should be treated as a partial exit or stop-management point. The trade becomes coherent only if there is a path toward 154-155, where the 200-DMA and the stronger payoff zone sit.
Estimated negative carry drag is about 16 pips over two weeks and 31 pips over four weeks, using the latest 2Y UST-JGB spread. That is manageable for a larger reversal, but it matters a lot if the move stalls near 156.31.
Rates and macro
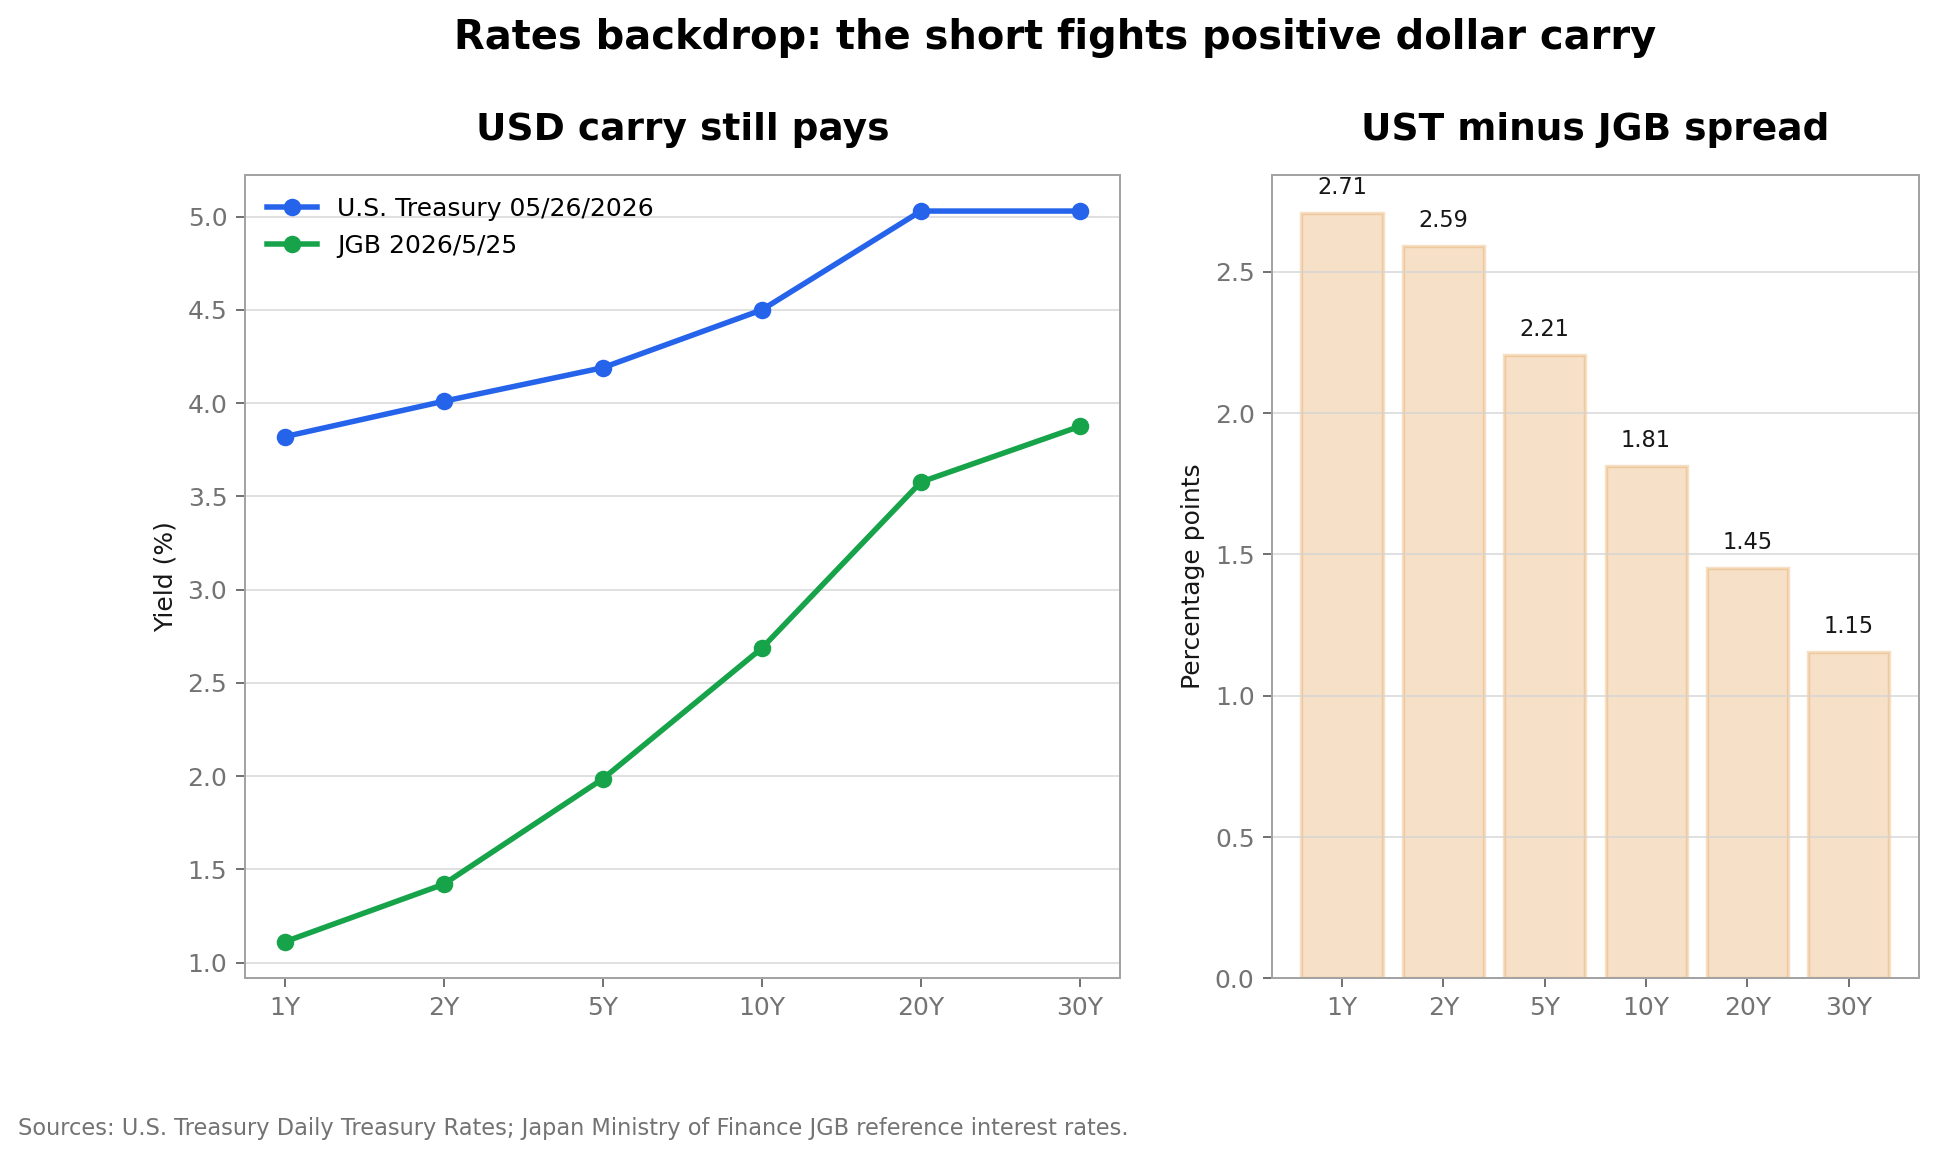
The Japan curve has repriced higher, but the U.S. curve still gives USD longs a carry cushion.
Latest curve data in the chart:
| Rate | U.S. | Japan | Spread |
|---|---|---|---|
| 2Y | 4.01% | 1.42% | 2.59 pts |
| 10Y | 4.50% | 2.69% | 1.81 pts |
The bearish USD/JPY case needs U.S. yields to stop helping the dollar. A downside break in spot without lower U.S. front-end yields is less convincing, because the carry trade can reload once immediate intervention fear fades.
The Japan side is improving for yen bulls. The BoJ held policy at 0.75% on April 28, but the vote was 6-3, and three members preferred 1.0%. That is a hawkish hold. It becomes more powerful if markets start pricing a near-term hike and JGB front-end yields rise while USD/JPY fails to make new highs.
Positioning
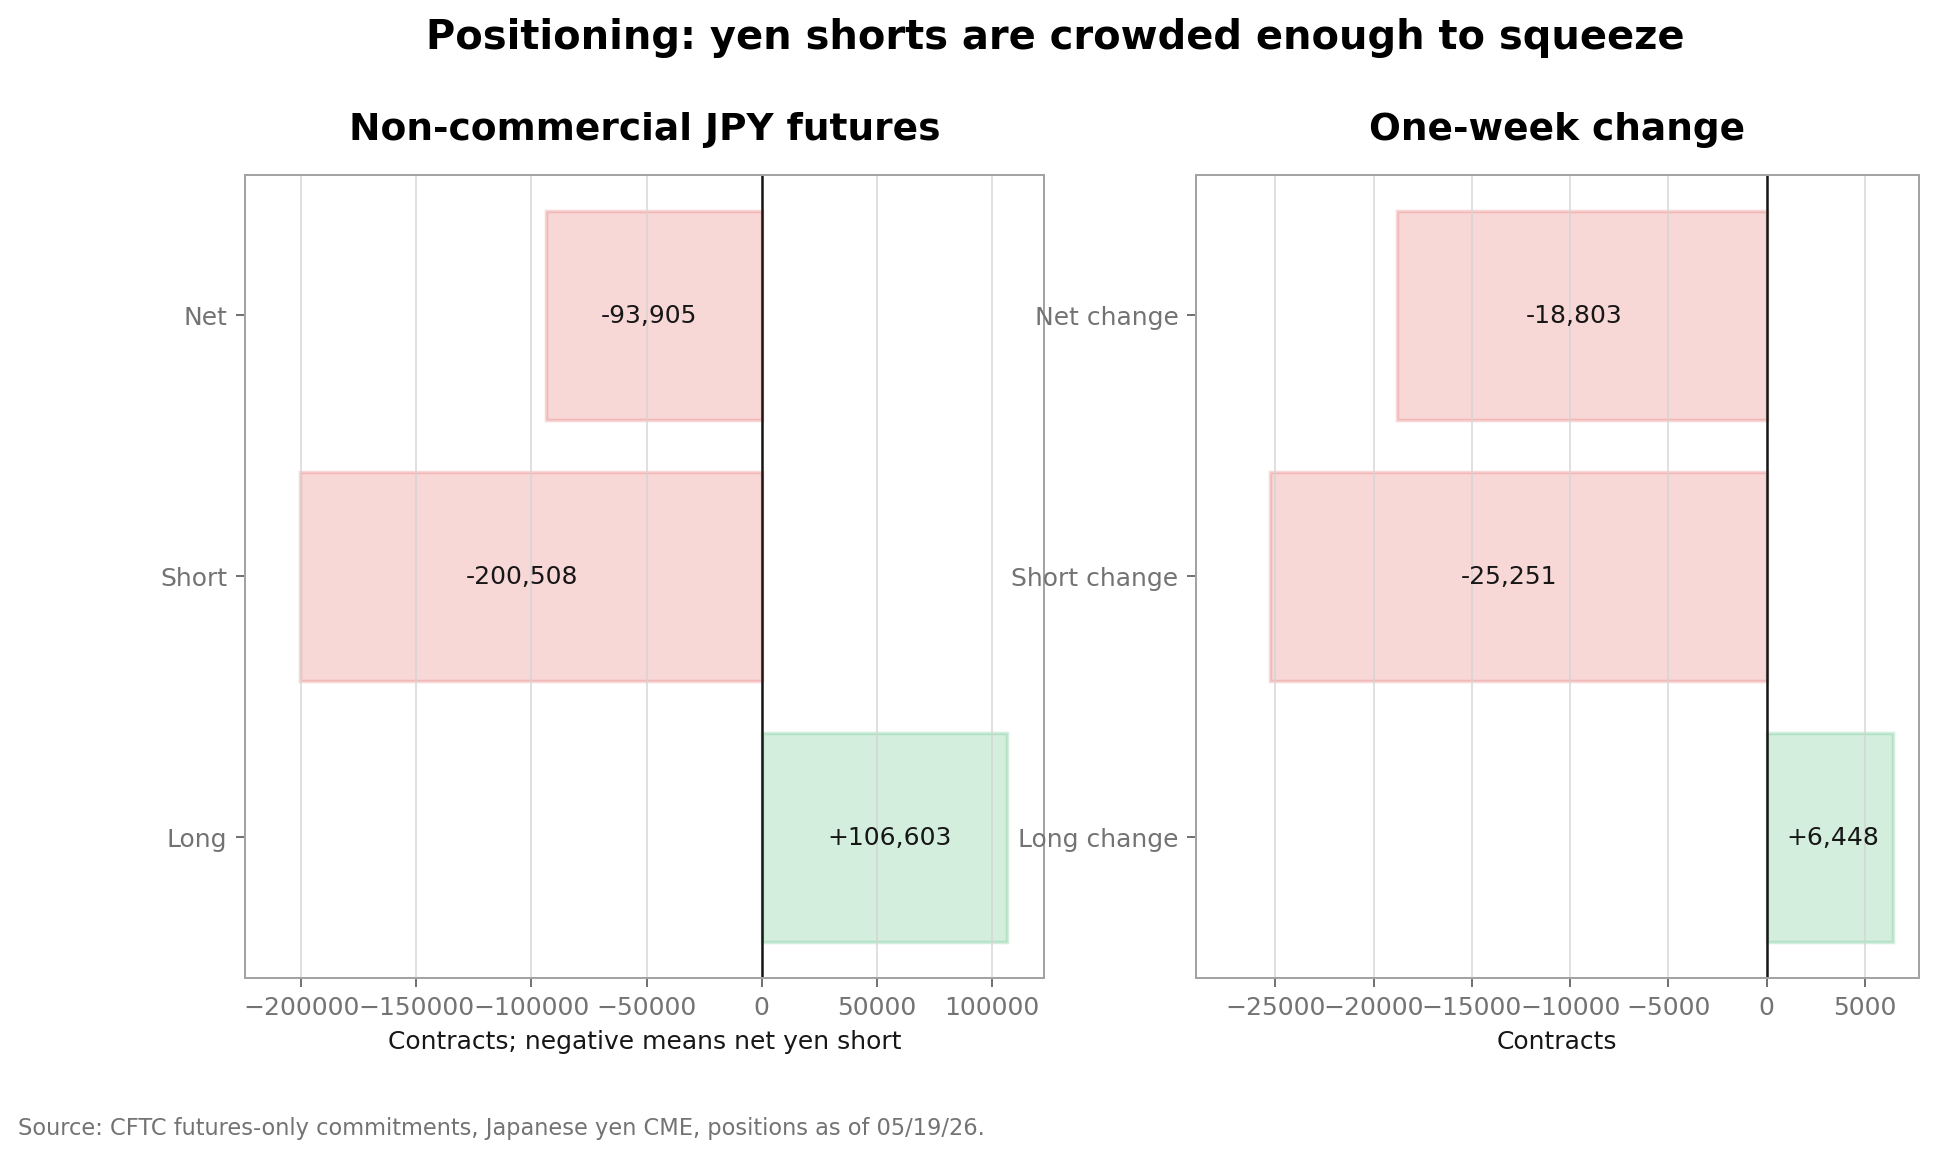
Specs are still meaningfully net short yen, and the latest weekly change added more short exposure than long exposure.
CFTC futures-only data for Japanese yen showed non-commercial traders at:
| Position | Contracts |
|---|---|
| Long | 106,603 |
| Short | 200,508 |
| Net | -93,905 |
| One-week net change | -18,803 |
That is squeeze fuel. The better setup is crowded shorts plus failed upside near 160, then a break below 157.50. If positioning is crowded and price keeps rising, the crowd is not trapped yet.
The 8+ setup
I want this combination before pressing the short:
| Condition | Why it matters |
|---|---|
Daily close below 157.50 | Confirms support has broken instead of merely being tested |
Failed retest of 157.50-158.00 | Creates a cleaner stop and better payoff profile |
| U.S. 2Y/10Y yields falling | Removes the biggest macro support for USD/JPY |
| BoJ hike odds rising | Turns the Japan side from passive to active |
| CFTC yen shorts still crowded | Keeps squeeze fuel in the system |
Acceptance below 156.40 | Opens the path toward the real target zone at 154-155 |
A catalyst would make the setup cleaner: soft U.S. payrolls or CPI, hawkish BoJ guidance, official Japan verbal intervention with price already failing, or a risk-off impulse that forces broad carry reduction.
Kill conditions
| Condition | Implication |
|---|---|
No break below 157.50 | No trade; support is still holding |
Daily close above 159.50 | The stop zone is failing |
Break above 160.70 | YTD high reclaimed; squeeze thesis delayed or wrong |
| U.S. yields rise while spot breaks lower | Higher risk of a false breakdown |
| BoJ pushes back against hike expectations | Japan-side catalyst weakens |
| CFTC yen shorts wash out before price breaks | Less squeeze fuel left |
Verdict
This is a patience trade. 157.50 is a real trigger zone, positioning is crowded enough to matter, and intervention risk near 160 creates asymmetry against fresh USD/JPY longs. But the trade only deserves capital after the break is confirmed and the macro tape stops rewarding dollar carry.
The plan is to let 156.31-156.40 reduce risk, then see whether the move can extend into 154-155. Without that second leg, the payoff is too thin.